
Learning how to swap out a golf shaft adapter is one of the most useful skills for any golfer looking to experiment with different shaft and head combinations. It opens the door to more customization, lets you take advantage of deals on components, and gives you the flexibility to fine-tune your equipment without relying on a shop.
Fortunately, changing a shaft adapter isn’t overly complicated. With a few essential tools and a bit of patience, you can do it yourself and gain more control over your golf setup. This guide walks through everything you need to know, from removing the old adapter to prepping and installing a new one.
What You’ll Need
Before getting started, gather the tools and materials listed below. Having everything ready will make the process much smoother.
- Bench vise
- Shaft puller
- Heat gun
- Drill with a wire brush attachment
- Sandpaper (fine grit)
- Epoxy and mixing sticks
- Tape or paper for your work surface
- Gloves
- Replacement adapter (also called a loft sleeve)
- Optional: ferrules and OEM adapter saver kits
How Long Does It Take?
The process itself takes around 20 minutes per club, but curing time depends on the epoxy you use. Some fast-setting epoxies may harden in 30 minutes, while others require a full 24 hours. Always check the product label and give it time to fully cure before hitting shots.
Step 1: Prepare Your Workspace
Before you begin, make sure your workstation is clean, well-lit, and organized. Lay out your epoxy, heat gun, sandpaper, drill, and all other tools so you can work without needing to stop mid-process.
Having everything within reach helps reduce frustration and ensures the entire procedure runs smoothly from start to finish.
Step 2: Remove the Old Shaft Adapter
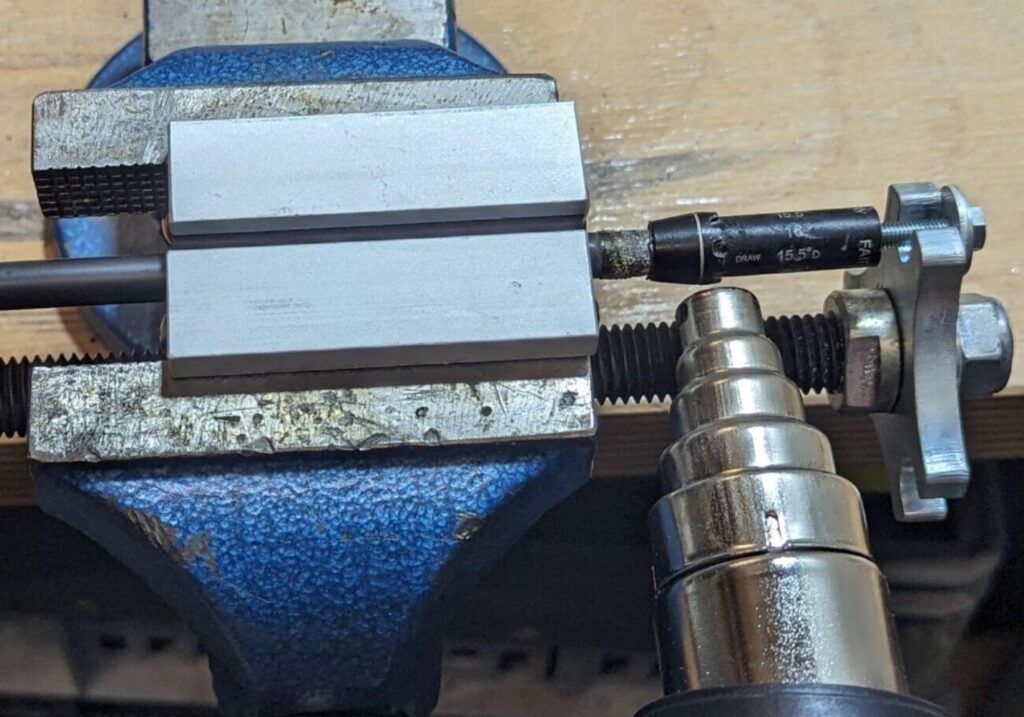
Secure the shaft in your puller and place it in the vise. Using the heat gun, apply low, even heat for about 30 to 40 seconds. The goal is to soften the epoxy inside the adapter, making it easier to slide off.
Be cautious with graphite shafts. Too much heat can cause damage, so keep the heat gun moving and avoid prolonged contact in one spot.
Once warmed, use the shaft puller to apply steady pressure. If you’re concerned about damaging the shaft or ferrule, consider using a screw and washer or an OEM adapter saver. The adapter should slide off cleanly.
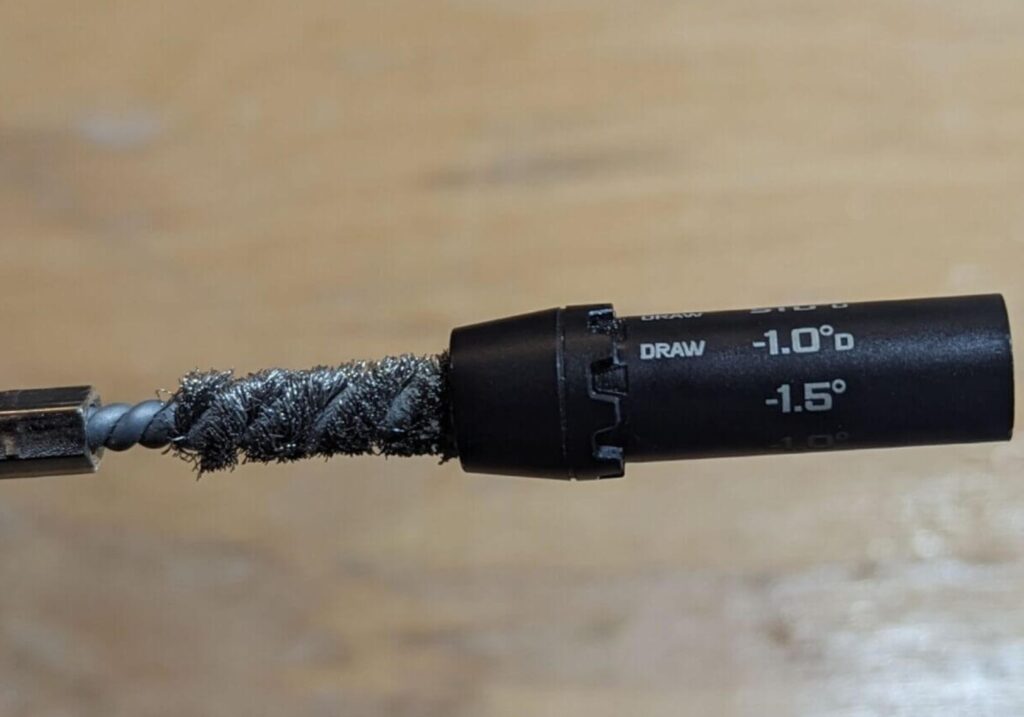
Step 3: Clean the Shaft and Adapter
After removal, you’ll likely see residual epoxy on the shaft and inside the old adapter. It’s important to remove all of this for a clean, secure fit when installing the new adapter.
Use sandpaper to gently strip old epoxy from the shaft, taking care not to damage the graphite. A wire brush attachment on a drill is ideal for cleaning the inside of the adapter while it’s still warm and pliable.
Check the tip of the shaft for any hardened epoxy as well. A small drill bit can help clear space for new adhesive and air release.
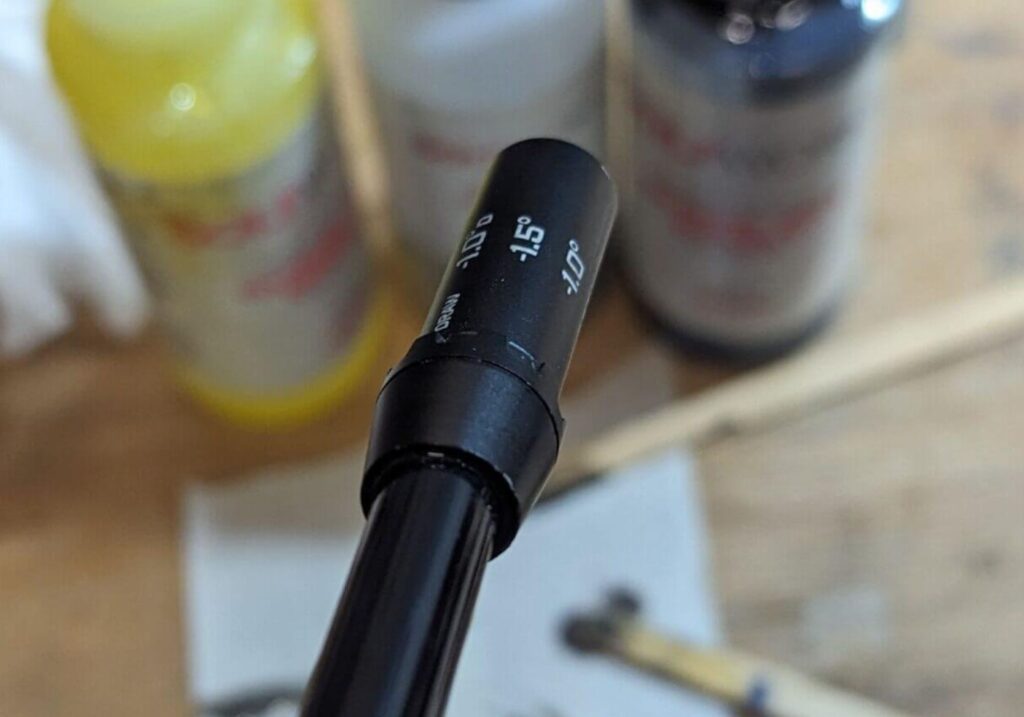
Once clean, do a dry fit by sliding the new adapter onto the shaft to confirm it fits properly. Mark the shaft to note how far the adapter should slide on. This also helps with aligning the adapter correctly relative to the grip.
Step 4: Mix the Epoxy

Before mixing, lay down tape or paper on your workbench to protect the surface. Squeeze out equal parts of epoxy and mix them thoroughly using a wooden stick.
Make sure the epoxy is fully activated and smooth. A proper mix is critical for a solid bond.
You can also add shafting beads at this stage. These help reduce movement between the adapter and shaft and improve alignment. Only a small amount is needed.
If your adapter setup requires a ferrule, install it now before applying any epoxy.
Step 5: Install the New Adapter
Apply epoxy to both the shaft tip and the inside of the adapter. Some builders prefer to dip the shaft into the epoxy, while others use a stick to spread it. Either method works as long as the coverage is even.
Slide the adapter onto the shaft, rotating it slightly to spread the epoxy evenly. There may be some resistance or trapped air, so an extra push might be required to seat it fully.
If you’re using a ferrule, slide it into position after the adapter is on. Excess epoxy will likely squeeze out. Wipe it clean with a paper towel. Gently tap the shaft on the ground to ensure the adapter is seated firmly and evenly.
Double-check for gaps or misalignment before the epoxy begins to harden.
Step 6: Let It Cure
Make final adjustments to the adapter alignment, then leave the club in a warm, dry space to cure for the recommended time. Avoid moving the shaft while it sets. Once the epoxy has cured fully, install the clubhead and give it a test swing.
A Note on Compatibility
Golf shaft adapters vary by brand and model. Titleist, TaylorMade, PING, Callaway, and COBRA all use different adapters, and even within the same brand, newer models might not match older ones.
Before starting, confirm that your new adapter is compatible with your clubhead. If you want to simplify things in the future, look into universal adapter systems like All-Fit, which use one adapter and interchangeable collars to work with multiple brands.
Cost Breakdown
Here’s what to expect if you’re buying everything from scratch:
- Bench vise: $20 to $30
- Shaft puller: Around $140 (the most expensive but essential item)
- Epoxy: $17 to $30
- Heat gun: Around $25
- Drill with wire brush kit: About $10
- Shaft adapters: $8 to $12 each
- Miscellaneous (tape, gloves, paper, etc.): Likely already on hand
While the upfront investment can reach around $250, these tools will serve you well for years and can be used for other club-building or repair projects.
Final Thoughts
Being able to change your own golf shaft adapters unlocks a whole new level of customization. You can experiment with different shaft and head combinations, capitalize on online deals, and dial in your equipment with confidence.
It takes some time and attention to detail, but the payoff is more control over your gear and the satisfaction of doing it yourself.
Got questions or want help with your first swap? Drop a comment below and let us know.